Monday, August 6, 2012

My Famous Rib eyes

Growing up my Dad always grilled Steaks on Friday or Saturdays if he was home. We never ate steaks out, always at home. They were always better at home. My family never eats steak out, it's much cheaper and tastes much better when I make them at home.


My steak of choice is a rib eye, always! They don't have to be too big. I like my rib eyes to have nice marbling but not too much. Remember to let your steaks come to room temp and pat them dry so the seasoning sticks better.


Beautiful steaks like these really don't need a lot of seasonings. I simply use my secret Texas seasoning, garlic salt & black pepper. You don't need a lot of different flavors because you want to taste the meat, but you do need a lot of salt & pepper so you can get a nice crust on the meat.


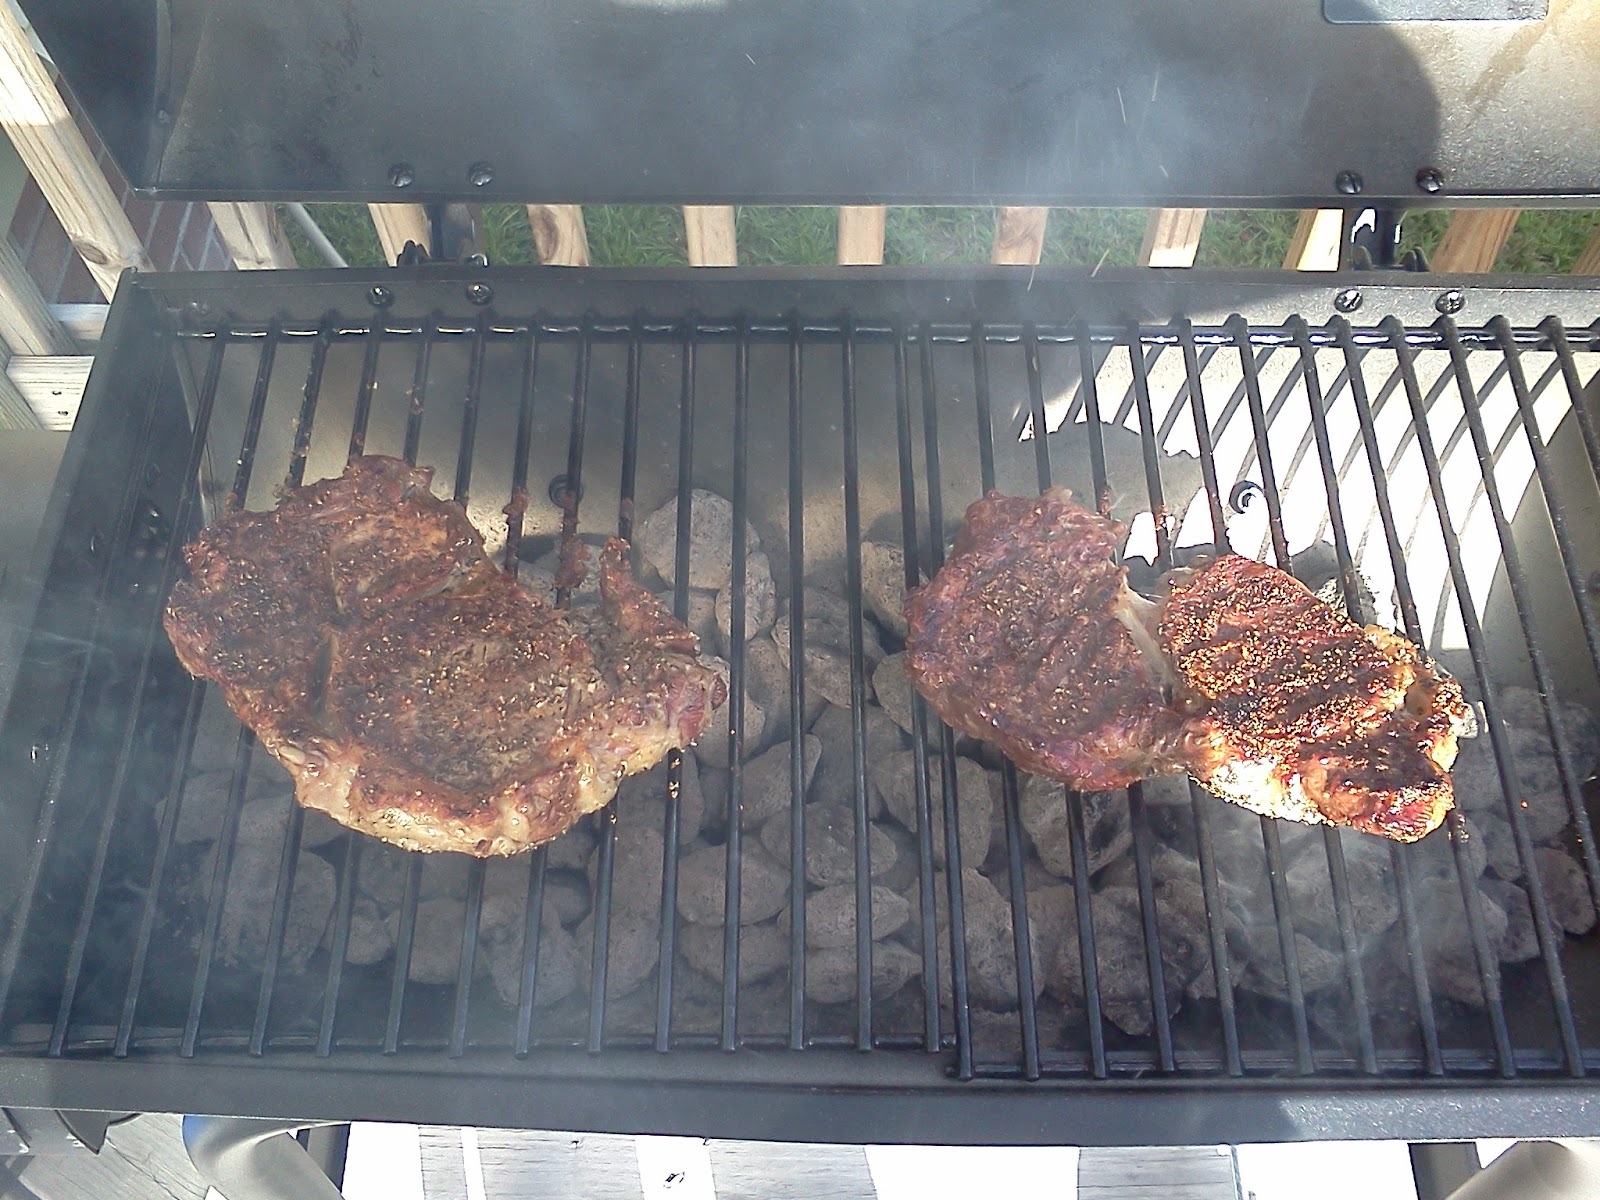
To grill the perfect steak your grill needs to be nice and hot. You don't want your coals to still be flaming. They should be red and white. Once you put your meat on the grill close the lid and leave it alone. Don't open the lid until it's time to turn the steaks over. You lose almost 200 degrees every time you open the lid, so to keep keep the lid shut to keep your temp up. For a perfect medium steak cook the first side for 8 minutes, flip and cook the other side for 5 minutes. Remember to let your meat rest for at least 10 minutes so the juices can settle.


I always make my special mushrooms when we have steaks, unless we are having steak tapiquena. The only time I like mushrooms is if they have been cooked in some sort of alcohol. Most steak houses have sherry mushrooms, my mushrooms are made with Vermouth. I suttee the mushrooms in butter until they are tender and slightly browned. Then I add the Vermouth and reduce to a glaze. If you are cooking with a gas stove remove the pan from the flame before adding the alcohol, you don't want it to catch fire. These mushrooms are amazing!


Here is what a steak dinner looks like at my house. I love a huge baked potato with my steak. I like the mushrooms on top of my steak with a little bit of the Vermouth glaze. There was nothing left of tonights dinner. My husband devoured his steak. This meal would easily be $24- $30 a plate at any steak house, my dinner was ony $25 for 2 people. Much cheaper and was better tasting!

Sunday, August 5, 2012

Old Fashion Comfort Food


My husband has been home for 5 days and today was his first dinner request, and you'll never believe what it was. He asked for beanie weenies and fried eggs! This simple hearty meal is actually one of his favorites. To me beanie weenies is a last minute, quick easy meal. It really doesn't take any time at all to make. All you really need is a can of beans and hot dogs, but I spice it up a little with some brown sugar, garlic salt and an onion.


Mix everything together and just pour it in a baking dish and bake @ 400 for about 20-30 minutes. My Dad use to make this but only when my Mom wasn't going to be home for dinner. She hates beanie weenies and goulash for that matter, she just doesn't know good food. The left overs from this meal are always eaten the next morning by my husband. This dish doesn't last at my house. This is also a very kid friendly dish. What kid doesn't like hot dogs? And it's a good way to get some iron in your kids with the beans.


To my husband this dish just is not complete with out a fried egg or two on top.


This meal is so cheap and easy it can be made for a crowd. You could take it to a pot luck dinner and I guarantee it will be a crowd pleaser. Being from El Paso, we put chile and salsa on everything. So of course my husband is going to dump some kind of heat on his plate.


I brought a bunch of these chiles home from El Paso and have them in the freezer. These are the best Hatch green chiles if you can't get them fresh from the farm in the fall. I use them in everything from beans to tacos. They are very hot so be careful.


Here is the final plating of this dish! Beanie weenies with two fried eggs topped with green chile.  It was delicious and there is just enough left over for Marcos' breakfast tomorrow. Breakfast will look just like this. Enjoy!!


Sunday, July 22, 2012

What kind of cook are you?

What kind of home cook are you? A planner? Do you plan out a month's menu and stick to it? Are you a "make ahead" cook? Do you prep and make most of the weeks dinners on Sunday?  Are you a Crock Potter? Do you make everything in a crock pot so dinner is just ready when you get home? I am none of these, when it comes to making dinner every night I plan by how I feel that day. I'm not going to know on Sunday that spaghetti is what I'll want on Thursday or that chicken soup will be great on the 21st of the month. I need freedom in the kitchen. I decide every morning what to make for dinner and I thaw out whatever meat I need.

No matter what kind of home cook you are, you must have an arsenal of seasonings and spices. I think I have everything from the spice isle at the grocery store. I have everything you could ever think to season anything with.  One of my friends said "a real cook has all the spices out on the counter because they are being used". In the picture you can also see that somethings are the industrial size, that's because they get used the most.


But not everything can be out on the counter, there just isn't space. So I have an entire cabinet for everything else. One of these days I'll have do a pintrest project to get this mess cleaned up a little better. I have 2 pumpkin spice jars and 2 jars of salt because I didn't see what I had and just bought another.


 You should also have a stocked pantry. My pantry is stock piled with just about everything you could ever need to make just about anything. Beans for chili, dried soup mixes for broiled potatoes, every kind of canned tomato you can think of, 7 different kinds of pasta and rice. I also have enough non perishable, eat right out of the can kinda foods just incase of emergancy, like huricanes. Having all this on hand makes it easy to fly free everynight with dinner because I have everything in my pantry to make something good.

Being well stocked in the kitchen can also be a life saver when you are faced with last minute dinner guests. My husband has called me in the middle of the afternoon to ask me if he can bring the new guy who just checked in to dinner. I can never turn a hungry mouth away. Having all those cans of beans and rice can help stretch a meal for last minute guests.

No matter what kind of cook you are, you should always have options in your pantry and the seasonings to spice up any dish. Get out there and make something tasty!

Thursday, July 19, 2012

Anticipation is making me wait

The Homecoming Hype is in full swing. Welcome home signs are being hung and homes are being decked out with American & Marine Corps flags and everything partiotic. Not my home though, my home is and will always be in a state of normal and calm. I haven't even told Greyson that his Daddy will be home soon. It's too far off for a 3 year old to understand and it's too hard to explain everyday for the # of days why it isn't today. I will tell Grey the same thing I told him last year, "we are going to a party" and when the buses finally pull up I tell him to look for his Daddy.

Keeping things calm and normal isn't just for Greyson, it's the only way I can stay sane as the last little bit of time drags on. I can't hurry up and wait, so I will get to the hype fashionably late. In 6 homecomings not a one has ever happened on the day and time the hype was meant for. One year a stick got delayed for an entire week in Germany because of a blizzard. Talk about a major disappointment! Last year the day of homecoimgn was pushed back a day just a few hours before the buses were suppose to arrive. So you can see why it's hard to get excited when homecoming is so close yet so far away. Ask me in a week and I might be more excited.


Other than the waiting, the worst thing about homecomings is the ungodly time of night the buses roll in. This picture is of last year's homecoming. It was taken after waiting for 7 hours in the cold wind. Greyson was over the party and just wanted to go home. This was an epic fail, we were told to be in the reception area around 5 only for the buses to arrive after midnight. Waiting with small children is the worst and now with two I am not looking forward to endless waiting outside. As hard it might be, this year I am going to do my waiting at home. Once they hit the armory I'll have enough time to get there. The armory fiasco is another long story for another time.


At the end of the day I can't be more excited that this is almost over. But the real excitment begins once he is home and life can return to normal again.

Saturday, July 14, 2012

Greasy Spoon Hamburgers


There is nothing quite like a greasy spoon hamburger. Burgers on the grill are great for a BBQ but sometimes you just want something different. Greasy spoon burgers remind me of old fashioned Diners. Greasy spoon hamburger joints are my favorite places to eat.


I read in a food magazine that the best bun for a hamburger is a potato roll. I have never had one before, so tonight was my first time trying one. I liked it. It held up well with the meat and toppings. This will from now on be my hamburger bun of choice. Try it and see what you think.


Tomatoes! To me this is the hardest thing to pick at the store. I find that most people just grab one and keep shopping. You want the tomato to be firm and not bruised, you also want the color to be a deeper red. A tomato that is very light in color isn't ripe and is mushy inside, that makes for a yucky tomato. Another thing a lot of people do terribly wrong to tomatoes is they put them in the fridge! This is a huge no no! The cold will alter the texture and taste of a tomato. A good rule of thumb when it comes to produce and weather or not it goes in the fridge is, if it's not in the cooler section of the produce department then it does not go in the fridge. Onions, potatoes, tomatoes and most fruit should not go in the fridge.


Another good tip for tomatoes is to cut them with a serrated edge knife. I find that a serrated edge gives you a better grip on the tomato and a cleaner cut. A secret that my Dad always did was he put the slices of tomato between two paper towels to absorb some of the moisture. This helps in keeping your bread from getting soggy. I also like to season my tomato right before I put it on my burgers or sandwiches. A quick sprinkle of garlic salt & pepper give it a little kick and add another layer of flavor.


I seasoned both sides of my patties with my secret Texas seasoning and salt & pepper. Make sure your skillet or griddle is smoking hot before putting your meat in. A little bit of oil is always a good thing. Remember to leave your meat alone! You only need to flip it once, so don't lift it to look at it or turn it. Let it fry for a good 5 minutes before you even think of turning it over.


Time to add the cheese! I can not and will not ever eat a burger without cheese, it just seems so wrong. Tonight I used plain old American deli cheese. Once the second side has cooked for about 3-4 minutes add the cheese and cover your skillet or the burgers on a griddle. Turn the heat down and just let the cheese melt into the patty. Once the cheese is melted nicely all over the burger I take it and let it rest for a minute on a paper towel to remove the excess grease before putting it on my bun.


Now your burger is ready for you to top anyway you please! There are so many different ways to top a burger, the choices are endless! Maybe once my husband is home I'll make some New Mexico green chile burgers to show you all. Enjoy!!

Friday, July 13, 2012

The Perfect BBQ Ribs

Most people don't know this  but ribs that are literally falling off the bone are actually over cooked. While you do want the meat to be moist and tender you also want  it to hold it's shape on the bone so you can pick it up and eat it. This is an easy fix, cook the ribs a little less. Making the perfect BBQ Ribs is one of the easiest dinners to make. All you need are a rack of baby back pork ribs, any BBQ sauce and salt & pepper


A very important rule that most people don't follow is to let your meat come to room temperature before seasoning it or cooking it. It allows the meat to relax and not tighten up when put on heat. Another good tip is to pat your meat dry before seasoning. Getting the extra moisture off allows your seasoning a better surface to penetrate. Liberally season both sides of your rib rack with salt & pepper. Wrap the rack in a tight foil pack and bake for an hour and a half @ 350. Allow the ribs to rest for 25 minutes in the foil pack and fire up your grill!!

Now it's time to put the final most important touch on the ribs! The sauce! As you can see I don't just use any old sauce from the grocery store. I bring home as much of Texas as I can and use anything Texas when I can in all my cooking.  But any sauce will do. Baste the meat side of your rack with your sauce and put meat side down on a hot grill on medium low heat. Allow the sauce and meat to crisp up before turning, maybe 5 minutes. Baste bone side with sauce before turning. Once you have turned the rack over coat with another layer of BBQ sauce. Flip your rack once more for a final quick minute.


Another very important rule that any cook should always follow is, allow your meat to rest for 10 minutes before cutting into it. This allows the natural juices to settle back into the meat. An over cooked rib rack would not hold up for the grilling part of this recipe. This is why it is so important not to over cook your ribs in the oven.

ENJOY!!

Thursday, July 12, 2012

JALAPENOS & BACON!!

Two of my favorite things that work so well together are jalapenos & bacon! Being a native southwest Texan jalapenos are an everyday ingredient. One of my favorite dishes to make with jalapenos are my Jalapeno Stuffed Bacon Wrapped Chicken.

There is a story behind my Jalapeno Stuffed Bacon Wrapped Chicken. When my husband was stationed at MCAGCC 29 Palms, CA we lived in my parents RV for 5 months to save money. If you have ever been camping in an RV you know how little space there is and what little cooking room you have to work with. So as a Marine Corps wife I had to adapt and over come. I revised most of my everday dinners to be grill friendly. So this recipe is something I came up with to spice up the weekly chicken dinner.


4 boneless skinless chicken breasts
8 jalapenos cored & seeded
Munster or Monterey Jack cheese sliced in sticks
1lb thick cut bacon
salt & pepper
thooth picks

Core & seed all the jalapenos, then roast in the oven @ 400 for 25 minutes. Let cool then cut in half. Cut a deep pocket in the thickest part of the chicken breast for stuffing. Place jalapenos & cheese inside pocket, salt & pepper both sides of chicken. Wrap chicken with strips of bacon until coverd, tooth pick bacon onto chicken. Grill chicken until cooked. Be sure to watch the grill for flare ups because of the bacon fat. Medium low heat works best.

As a foodie and a home cook extraordinaire I spend a lot of time reading through food blogs and watching anything cooking on TV looking for new recipes and ideas to try at home. So I guess maybe it's time I have my own food inspired blog. So here I go!

It's time to start planning for my husbands homecoming but it's a little soon to be overly excited. I've started making my grocery list and thinking about all the yummy things I want to make for him once he's home. Since he's been gone I have archived, pinned and saved a bunch of new recipes that I want to try. I want to make everything that was made on The Chew today. There is something about summer time food that makes my tummy growl. When I asked my husband what all he wanted me to have for him when he first came home, all he asked for was almonds. He told me just to do what I do best. So now the question is where to start?

I still have some time to look through all my favorite blogs and food sites to narrow down a menu. What are some of your favorite things to eat or make at home?